My friend asked me if I could alter this box they purchased from a local store for her daughter's wedding. Instead of doing a unity candle during the ceremony they decided to have the bride/groom's parents put something memorable in the box along with a few other family members. They will open this on their 5 year wedding anniversary...what a great idea.
Here's the completed box...


And here's the box before I altered it...


As you can see...this box was pink with spots all over so in order to make this match their wedding colors I had no choice but to paint the entire outside.


I mixed some brown & purple paint together to come up with the color I wanted...I had the invitation & the color I mixed up matched perfectly.

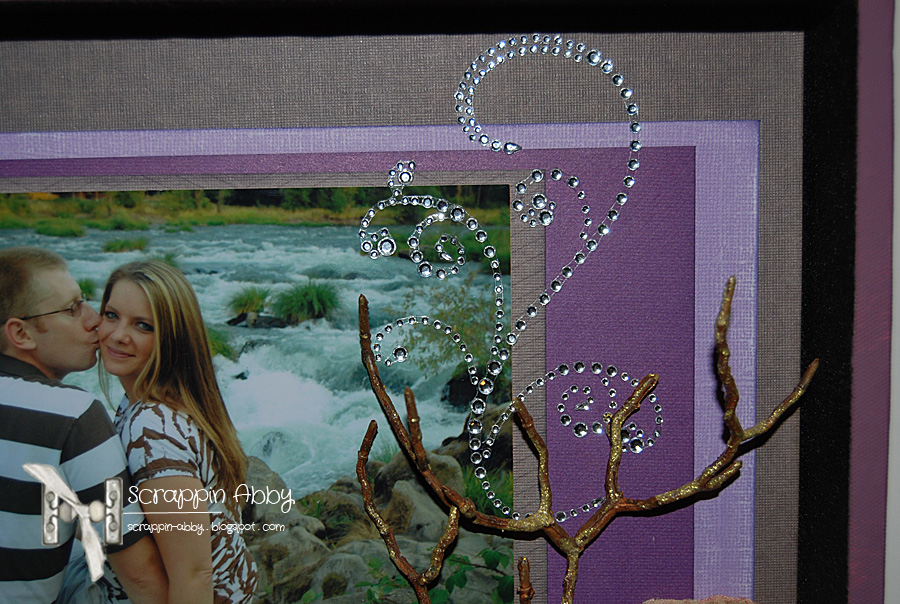
The next few photos are the stages of creating the layers for the layout...


How do you like my high tech method of pressing the flowers into the liquid adhesive..haha...hey it worked : )
Now for some photos of the completed project...


I just LOVE how this box turned out & to be honest with you..I wanted to keep this for myself..haha. I love purple so this project was right up my design alley for sure!!
Thanks for making it through all of the photos...I felt it was important to show the before..during..and the after of this project so you could see all the phases of altering. I really enjoy these types of projects & I'm in the middle of another altered project right now..be sure to come back so you can check that one out too : )
I do want to mention that 3 Girl Jam has started a new challenge blog...you can read all about it HERE! There are some FAB challenges lined up with some great prizes as well as two giveaways on the challenge blog...so be sure to check it out..you won't want to miss it. I'm on the 3 Girl Jam DT and we are all very excited about this new challenge blog : )
I'm also submitting this post & project for the Basic Grey Altered Artist DT spot..so keep your fingers & toes crossed for me : )
I'm also submitting this for the Sarah Hurley Altered Challenge
Be sure to come for another scrappy post!!
Oh this is beautiful! I love all the pictures because it helps those of us that might to give this a try. You did a great job and bet your friend's daughter (along with your friend) will be so thrilled!
ReplyDeleteTake Care,
Stacey
Abby - Absolutely stunning!
ReplyDeleteWhat a fantastic repurpose for this box. It came out beautiful!
ReplyDeleteThanks so much for visiting my blog on the blog hop!
It's gorgeous,I love what you've done with it.Thanks for sharing it at Sarah Hurley's Challenge Blog.
ReplyDelete