Hi Friends! As a DT member with Linnie Blooms it's my turn to join in on this month's challenge "Create a project using a quote". Technically we're supposed to use our favorite quote but I really don't have a favorite...I have a lot that I really turn to depending on the mood or situation I'm going through. So the one I'm sharing today is more of a positive/gratitude quote.
I created an art display piece that I already have displayed in my craft room...
I also have a short video that shows you the project up close along with the products I used...
I altered a wood block using a combination of various craft paints...I wanted to match the green in the fabric I was using for the project...
While I was waiting for the block to dry, I started working on the butterfly canvas die. I am LOVING the new mixed stitch stamps Linda Barutha has designed so I wanted to incorporate them in my project...
For the rest of the project I just used some sprays and crackle paint on the wood block and fabric to give it that shabby chic feel that I love so much and then I added the other elements...
This was such a fun and easy project to create using the fabulous canvas pieces and stamps from Linnie Blooms. This would be a great gift for any occasion. Be sure to stop by the Linnie Blooms STORE and pick up some of the fun products so you can use them on your crafting projects. Thanks for stopping by my blog and for checking out another ScrappinAbby project. Happy Crafting!!
Hi Friends. Today I'm back with another Linnie Blooms creation to share with all of you : ) I created a friendship tag using the bird canvas piece that I'm giving to a very good friend of mine....
I also have a video that shows you the project up close along with a tutorial on how I achieved the texture on the bird canvas piece...
I knew I wanted to use a stencil to create the background so I could create a base that I could build on....
For added texture...I used some Crackle Accents on the colored parts of the stenciling...here's a before photo...
And this is how it looked once it was dry...
I used a paintbrush and dipped it into my Lindy's spray so i could add more of the Tiffany Lou Blue to the edges of the canvas bird...
Once this was dry...I added some Creme Brulee Cream Lindy's spray and some gold paint by Smooch. This really added some extra texture and dimension to the canvas bird and I LOVE how it turned out...
Don't toss your scraps leftover from another project...I was able to use the last bit of the Linnie Blooms Burlap piece as additional texture and background for the tag :)
I am lovin how this tag turned out. You can create so many layers and textures with the canvas pieces from Linnie Blooms and they turn into a piece of art. Be sure to head to the Linnie Blooms Store and grab some of the canvas pieces & burlap so you can create your own piece or art. Thanks for stopping by my blog today and for checking out another ScrappinAbby project. I hope I was able to inspire you to create something fun with the Linnie Blooms canvas pieces & burlap. Happy Crafting : )
Hi Friends! Today I'll be sharing another fun project with you for Linnie Blooms June's Challenge: Outdoor Fun. This month we'll be showing you some fun ways to use your LB Stencils/Masks and Canvas pieces to show what kind of outdoor fun we will be having this month. I have a secret though...my outdoor fun isn't until July when we're on vacation so don't tell anyone ; )
I created a mixed media layout using some of the LB canvas pieces....
I also have a video that shows you the project up close along with a tutorial of how I created the leaves using some of the LB Canvas Pieces...
In the video...I walk you through the steps on how I created the leaves for this layout but below is a photo of the process so you can see the transformation...
Love how these turned out and how they added such a fun texture and pop of color to the layout....
I can't wait to put a family photo of us on the beach on this layout once we're back from our vacation next month. This is going to be a fun addition to add to my gallery wall at home and what a way to remember a fun day of my family enjoying some "Outdoor Fun".
Thanks for stopping by my blog today and be sure to head to the online store and pick up some of the Canvas Pieces for yourself.
Hi Friends! Today I'm back with another fun DT project to share with all of you. This time I created a cool teenage-themed mixed media tag using some of the canvas flower pieces from the BLOOM collection.
I also have a video that shows you the tag up close along with a short tutorial on how I altered the bloom canvas pieces & used them as the skirt for my Prima Doll Stamp....
I really wanted to create something different with the bloom pieces and use them in a different application other than a flower. I knew I wanted to have some sort of texture/image on the canvas so I used some Archival Jet Black ink and used one of my background stamps...
Next I used some spray that I watered down a bit with some water on the canvas pieces (please note that I didn't cut the flowers in half until after they were sprayed)....
I used my TH Tiny Attacher to create pleats on each end of the flower piece I was using. This created a draped and skirt like effect with the pieces. I just made the pleats go in a little further with each layer to create that ruffled skirt look...
Once that final step was complete, I just began layering all the elements on my tag. Super easy :)
I just love how the skirt came out using the Bloom canvas pieces. Such a fun project that really is quick to create. Be sure to head over to the Linnie Blooms store and pick up some fun canvas pieces to use on your mixed media & other crafty projects.
Happy Crafting!!!
Products used: Linnie Blooms-Bloom Canvas pieces~flower Prima Doll Stamp Kraft Tag DCWV-Lavender Stack Prima Ledger Paper pad Archival Ink-Jet Black Lindy's SG-Sea Mint Green spray TH DI-Walnut Stain & Frayed Burlap Cloud 9 Designs-clear stamp set Flat back pearls Jute Twine Misc flowers leaves/from my stash
Hi Friends! I'm happy to share another Linnie Blooms DT project with all of you. This time I wanted to play with the Stencils & Masks from Linnie Blooms and I created a card for a good friend of mine who is recovering from surgery....
For this card I used the following stencils & masks....
I also have a video that shows you the card up close along with a tutorial on how I used the stencils & masks for my card....
To start I selected the papers & sprays I wanted to use with the stencils & masks....
The next few photos show you how I used the stencil & mask for the different elements I added to the card....
For the larger flower, I spritzed it with some water, crumpled it up and used my heat tool...
I wanted to add a distressed feel to the butterflies and leaves I made from the card stock and a scrap piece of fabric...
Once all of my pieces were dry and distressed, I just started layering them on the card....
I layered the butterfly stencils that I made on two different types of paper so it would have a layered look. Love how that turned out : )
I love all the layers and textures on this card. Using the stencils & masks with your paper really creates some great dimension I think. It's fun to create your own embellishments for your projects and using the Linnie Bloom stencils makes it easy to do that. Thanks for stopping by my blog today and for checking out another ScrappinAbby project. I gave this card to my friend yesterday and she loved it! Be sure to stop by the Linnie Blooms BLOG today and see the post over there as well. Happy Crafting!!
Product list: Linnie Blooms Stencils/Masks: Butterflies & Bloom sets Websters Pages-various papers, green floral trim 3 Girl JAM-New LG Bundle-Lemon/Lime & Grey Gray Lindy's Stamp Gang-Scintillating Silver, Tiffany Lou Blue, Frozen Jack Frost, Sea Mint Green, Mystic Malachite Flat back pearls Corrugated card stock Flower stamens Ranger Archival Ink-Jet Black
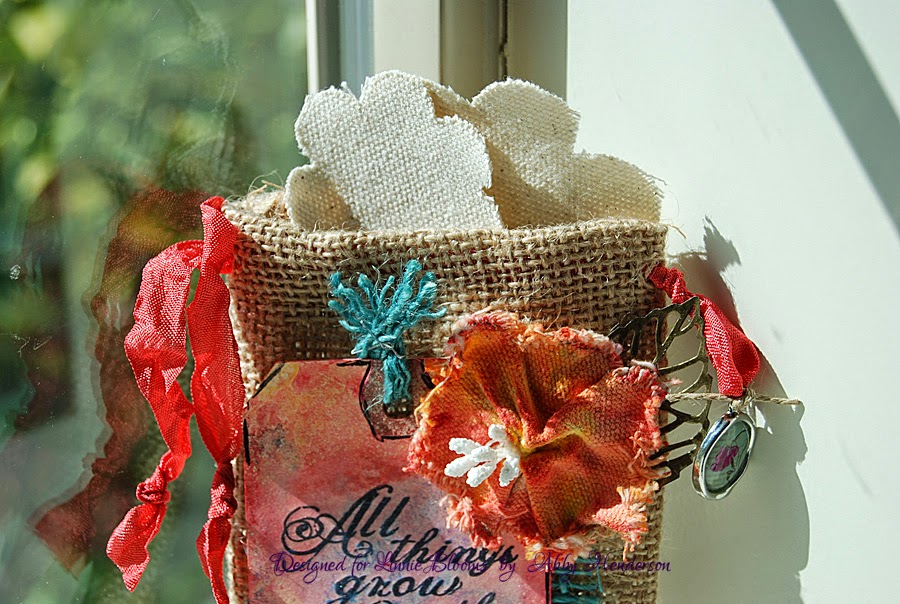
Hi Friends! Today I'm sharing another DT project for Linnie Blooms and I have a really fun & easy project to share with all of you that I created for the May Challenge~April Showers Have Brought Us May Flowers. This challenge is all about showing different ways to use the Linnie Blooms Canvas Flowers.
I also have a video to share with you...this shows the products I used along with a short tutorial on how I colored the canvas flower with some Gelatos...
To get the flower shape I was going for, I wet it with some water then used my heat tool to dry it...
My hubby bought me some Gelatos for Mother's Day so I was excited to use these for this project. I selected the colors I wanted to use and covered the flower in a no particular fashion. I spritzed the flower lightly with some water so I could mix the colors into the flower (sorry I don't have a photo of the actual process...I was the only one home and couldn't take a pic myself..lol but I do have this in the video above : )
I wanted to make the flower appear more real & natural so I added some stamens to the center by making a small cut in the backside of the canvas flower and pushing a few stamens through the center...
To create a unique tassle for my tag, I separated the fibers from the Linnie Blooms burlap and looped them through the top of the tag and used my tiny attacher to hold them in place...
I thought this was a fun challenge and a creative way to use the canvas flowers along with the burlap. I made this for a friend of mine and I'm going to be putting some seed packets in the bag. I think she will love it : )
Thanks for stopping by my blog today and for checking out another ScrappinAbby project for the May Challenge. You'll want to stop by the Linnie Blooms BLOG and see my tutorial posted over there as well.
Be sure to head over to the Linnie Blooms online STORE so you can pick up some of these FAB canvas pieces for yourself.