Hi Friends! Today I'm back with another fun DT project to share with all of you. This time I created a cool teenage-themed mixed media tag using some of the canvas flower pieces from the BLOOM collection.
I also have a video that shows you the tag up close along with a short tutorial on how I altered the bloom canvas pieces & used them as the skirt for my Prima Doll Stamp....
I really wanted to create something different with the bloom pieces and use them in a different application other than a flower. I knew I wanted to have some sort of texture/image on the canvas so I used some Archival Jet Black ink and used one of my background stamps...
Next I used some spray that I watered down a bit with some water on the canvas pieces (please note that I didn't cut the flowers in half until after they were sprayed)....
I used my TH Tiny Attacher to create pleats on each end of the flower piece I was using. This created a draped and skirt like effect with the pieces. I just made the pleats go in a little further with each layer to create that ruffled skirt look...
Once that final step was complete, I just began layering all the elements on my tag. Super easy :)
I just love how the skirt came out using the Bloom canvas pieces. Such a fun project that really is quick to create. Be sure to head over to the Linnie Blooms store and pick up some fun canvas pieces to use on your mixed media & other crafty projects.
Happy Crafting!!!
Products used: Linnie Blooms-Bloom Canvas pieces~flower Prima Doll Stamp Kraft Tag DCWV-Lavender Stack Prima Ledger Paper pad Archival Ink-Jet Black Lindy's SG-Sea Mint Green spray TH DI-Walnut Stain & Frayed Burlap Cloud 9 Designs-clear stamp set Flat back pearls Jute Twine Misc flowers leaves/from my stash
Hi Friends! I am really excited to share my first official project as a new member of the Linnie Blooms Design Team!!!
I had so much fun playing with some of the canvas pieces and I came up with a creative & decorative way to not only store my pieces but to organize them as well.
I recycled some vegetable cans and created these sweet containers that I decorated with some of the very same canvas pieces these will store. I also have a video to share with you that shows you the project up close along with the Linnie Bloom items I used....
Let me share with you the fun techniques I used on the canvas pieces...
For the flower, I used a script background stamp to create some texture and visual interest.
Next I used some sprays to give it some color and used my distress tool to fray the edges to give it a shabby chic look...
I did the same technique for the leaf pieces but used a different background stamp...
For the butterfly I stamped an actual butterfly image on the canvas piece then used some distress ink to give it some color....
I wanted to have the illusion that the butterfly had just flown into my craft room and landed on the vine so I taped the wire I had left from when I cut my flowers to the backside of the butterfly so I could bend it as if it was in motion....
For the bird I used some embossing powder for added texture and shimmer....
Lastly, I used the same treatment on all the banner pieces that I attached to each altered can....
Here are a few more photos of the completed altered cans....
And here's how they look on my shabby chic vintage hutch....
Be sure to check out all of the fabulous Linnie Blooms Products available so you can use them in your crafting projects as well.
Thanks for stopping by my blog today & for checking out another ScrappinAbby project. Be sure to visit the Linnie Blooms Blog so you can see additional photos of the altered cans.
Happy Crafting and I am SO happy to be a part of the Linnie Blooms Design Team and share some crafty & creative projects with all of you.
Hi Friends! I have a special card to share with you today. This is for a good friend of mine who recently lost her mom. I wanted to send something to her that would let her know that I was thinking about her. I've lost a parent myself so I know the grief and how hard it is to move forward when something like this happens.
I also have a video that shows you the card up close along with the products I used....
LOL...sorry I had to throw this one in here. She was looking at me like this when I was taking my pics of the card : )
I really love how this card turned out and I'm hoping my friend loves it as well and it brings her some comfort knowing that she has friends keeping her in their thoughts and prayers.
Thanks for stopping by and for checking out another ScrappinAbby post.
Hi Friends. I have a really sweet baby congratulations card to share with all of you. A friend of mine at work just found out that she is going to be a grandma. This is her daughter's first pregnancy and I've made some crafty things for her before for their wedding last summer. So since this is such a happy occasion for her, I wanted to create a card for Heather congratulating her on journey into motherhood.
For this card I used some of sweet Baby Boy and Baby Girl Crinkle Ribbon from the Baby Bundle along with a bit of the Latte ribbon from the from newly released Coffee Bundle from 3 Girl JAM.
I love mixing the different Crinkle Ribbons from all the bundles that 3 Girl JAM has to offer.
If you don't have any of these colors in your ribbon stash..be sure to head over to the 3GJ Store and get some today. I hope you enjoyed my card & I can't wait to put this in the mail for Heather.
Thanks for stopping by and Happy Crafting!!
Products used: 3 Girl JAM-Baby Bundle & Latte crinkle ribbon from the Coffee Bundle G45 Little Darlings Tim Holtz Distress Ink-Frayed Burlap & Walnut Stain Hopscotch Crafts-metal leaf Tanner Bell-It's A Baby stamp set Want 2 Scrap-flat back pearl Prima Flower-white Card Stock Lindy's Stamp Gang-Glitz Spritz Scor-tape
Hi Friends..I hope you all had a fantastic weekend. Today I'm up over at the 3 Girl Jam Blog and I am excited to share my project with all of you here on my personal blog as well.
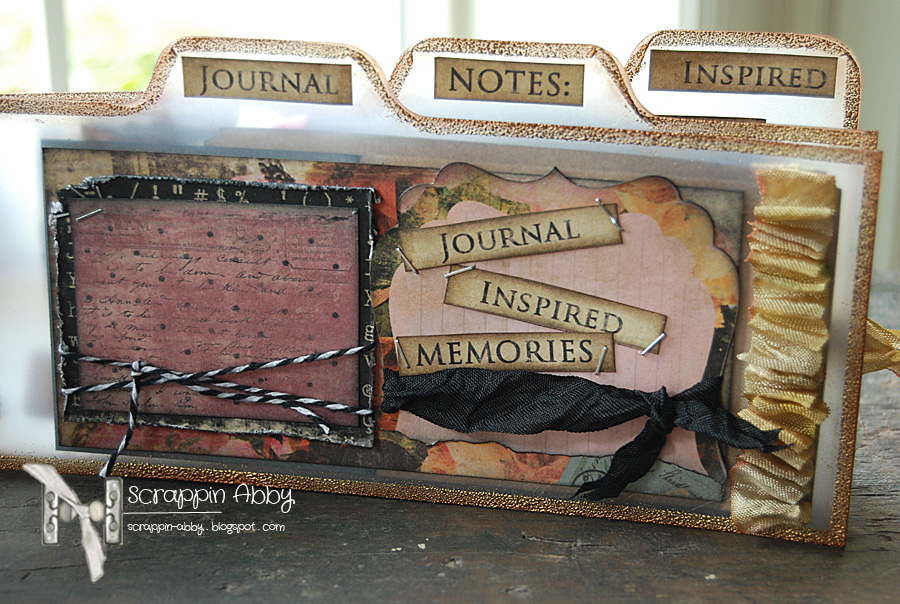
I created a romantic "Things I Love" mini using some of the yummy Crinkle Ribbon, Prima Romance Novel Collection and the Maya Road Top Tab Album.
I absolutely LOVE how this mini turned out. I actually only used half of the Top Tab album so I can make another one with a totally different look if I want to..love that!!
I tried to incorporate and use the ribbon in different ways other than just making a bow or wrapping it around a tag and I really liked how this turned out. I used some gold embossing powder around the edges and inked them a bit to give them the vintage feel.
I know this was quite a string of photos so thanks for sticking with me on this post. Be sure to head over to the 3GJ blog and grab yourself some of this amazing crinkle ribbon!
Be sure to come back for another scrappy post...I have a super exciting announcement that I'll be making on my blog later on today : )
Happy Craftin!!
Products used: 3 Girl Jam Crinkle Ribbon-Wine & Jewels Bundle, Halloween Harvest, Christmas Candy, Tuxedo, Maya Road-Sheer Top Tab Album Prima-Romance Novel Collection Tim Holtz Distress Ink-Walnut Stain, Black Soot LYB-stick pins Scor-tape Gold Embossing Powder Want 2 Scrap-bling