Showing posts with label My Minds Eye. Show all posts

Wednesday, October 30, 2013

Trick or Treat Hallow's Eve Treat Box

Hi Friends! Today I have a classic-vintage themed Halloween Treat Box I created using some of the yummy Crinkle Ribbon from 3GJ and some other crafty items. 

I have a quick video that shows the project up close along with the Crinkle Ribbon I used (you can skip to about the 4 minute mark if you want to get right to the project view).....

Here's the yummy Crinkle Ribbon I used on this treat box...
Halloween Harvest

I used the Halloween Harvest around the edge of the treat box lid and tucked it in among the flowers around the sweet little girl image..


I think this is such a fun & decorative way to give that special "ghoul" in your life a sweet treat!!

Be sure to stop by the 3GJ STOREand "Treat" yourself to some yummy crinkle ribbon : )

Thanks for checking out another ScrappinAbby project. 

Happy Halloween and happy craftin!! 

Products used:
3GJ Crinkle Ribbon-Halloween Harvest
My Minds Eye-Nightlight collection
DCWV-The Ghost & Goblin stack
G45 Happy Hauntings collection
Acetate sheet
Circle punch
MS Iron Gate punch
Back cardstock
Glossy Accents & Crackle Accents
Ranger Stickles-Holly, Copper & Goldenrod
Black glitter glue
Black sand
Glue & Seal
Mon Ami Gabby-flowers
Lindy's Stamp Gang-Scintilating Silver & Gossamer Gold 
Scor-pal
Scor-tape...phew : )


Tuesday, April 16, 2013

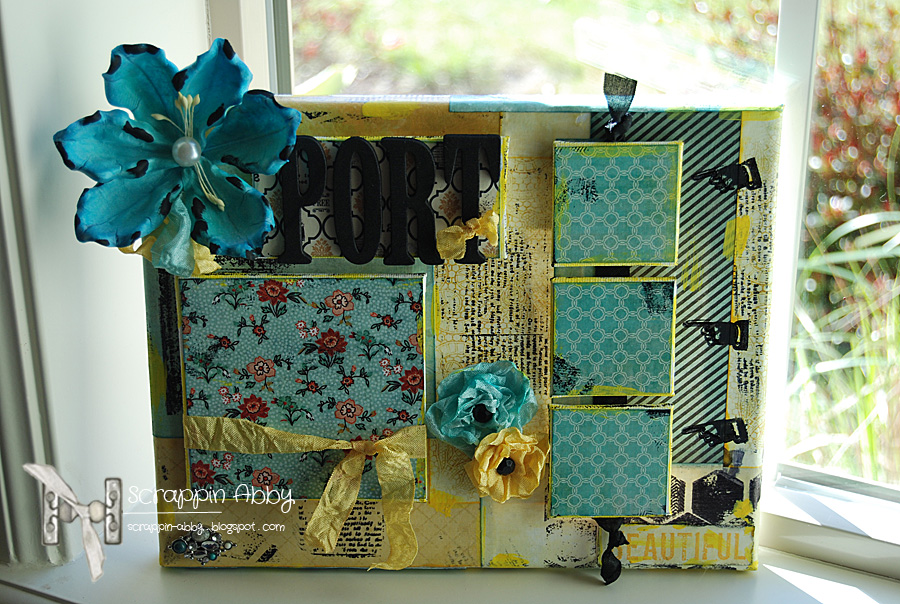
3 GJ Mixed Media Canvas

Hi Friends!! Welcome back for another scrappy post. Today I'll be sharing a mixed media canvas that I created for one of my friends which also happens to be my DT project for 3 Girl Jam.

Here's how it turned out.....
 I used the Aqua Splash, Tuxedo and Daffodil Crinkle Ribbons from 3GJ. I think they work so well together on this canvas don't you? 

I also have a short video that shows you the canvas up close as well as the stamps, paper collections and other techniques I used to create this. 

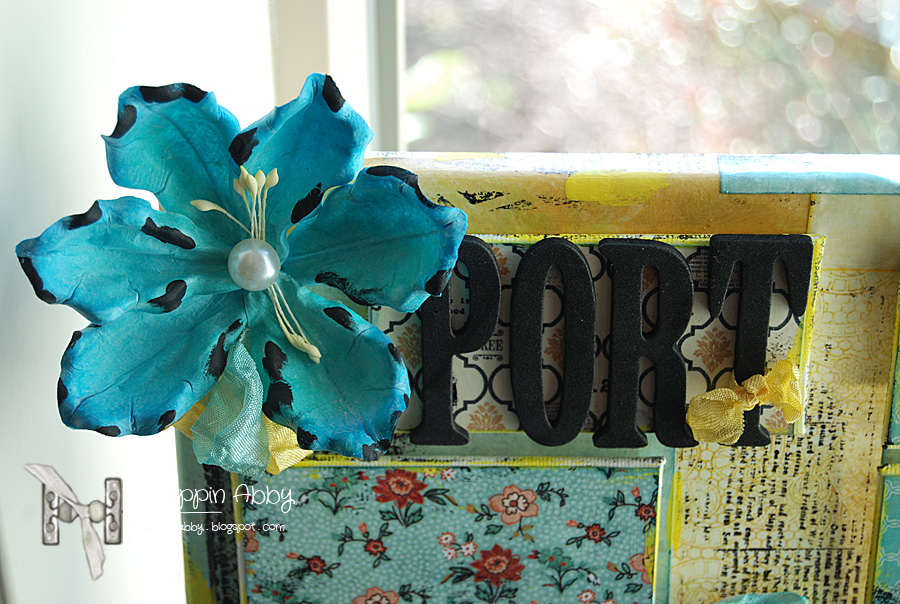
Here are some additional photos....
I used a mix of 3 different sizes of canvas to create some dimension and photo space on the 8x10 canvas. You can also see the sweet flowers I made with the 3GJ crinkle ribbon. I love 3 Girl Jam crinkle ribbon...it adds so much to your projects...it really does. 

I wanted to get a photo of Alisha with the canvas when I gave it to her at work on Monday but alas I forgot..lol. I can tell you though she seemed to really like it and that's what really matters. 

Be sure to stop by the 3GJ shop and pick yourself up some yummy crinkle ribbon goodness if you haven't snatched some up already. 

Thanks for stopping by and for checking out another scrappy post.

Happy Craftin!!

Products used:
3 Girl Jam Crinkle Ribbon-Aqua Splash, Tuxedo, Daffodil
Glitz Vintage Blue paper collection
My Minds Eye Memorable paper collection
Teresa Collins Vintage Finds paper collection
Basic Grey Serenade & Lucille paper collections
Mon Ami Gabby-latex flower
Mod Podge
Craft paint
Alcohol ink
Scor-tape
Ranger Archivers ink
CTMH ink
Adorn it thickers
Stamps used:
7 Gypsies, My Minds Eye, Tanner Bell, Glitz, Tim Holtz


Wednesday, May 30, 2012

PSC34:Anything Goes With A Sentiment

Hey everyone..I can't believe it's Wednesday already..having a 3 day weekend has made this week just fly by : )

We have a super exciting fun challenge for you this week at the Perfect Sentiment. It's an "Anything Goes with a Sentiment Challenge" and the twist is not to create a scrapbook page...but you can knock yourself out with ATC, tags, cards etc. I was really jazzed about this challenge as I love to make tags as they are quick and easy projects and fun to & they make great gifts as well.

Here is my scrappy creation for this week's challenge.....

I went to town technique wise on this baby...I did some resist-embossing (for those of you who aren't sure what that is..I did a tutorial on this technique HERE) distress inking, and blended some inks together to create a unique look.

Here's a closer look at the resist embossing & distress ink.


And one last look........


And now for some amazing inspiration from my fellow DT members......

Jenn
Cheryl
Jan
Karen
Maggie
Sam
Sassy
Tabitha

Theresa
May Guest Designers:
Connie
Shell

Our sponsor for this week is Limited Runs Digis
They are offering up 3 digis from their online store for this week's winner...pretty nice prize huh? You can also earn the coveted spot of the Perfect 3 when you enter your creation for this week's challenge.

Now that you have been inspired by the PSDT...head into your creative space and start working on your card, ATC, tag, altered art etc for this week's challenge. Remember..whatever it is you choose to create must have a sentiment on the front and no scrapbook pages please.

Be sure to come back for another scrappy post.

Happy Craftin!!

Products used:
Ink Essentials Craft Tag
My Minds Eye-Hip & Luxurious Basis Tags-Orange
The Twinery-Charcoal
Butterflies-scrappy stash
Ranger Perfect Medium
Colorbox Cat Eye Chalks-Yellow Cadmium
Tim Holzt Distress Ink-Frayed Burlap
Stampology-Card Sentiments clear stamps
Studio 112-Butterfly stamp
Close To My Heart-Clear embossing powder
Black/white checked ribbon-scrappy stash
Want 2 Scrap-bling
Staz-on Jet Black ink

Thursday, March 29, 2012

Thursday Craft'n Chat-Resist Embossing Technique

Hey Everyone...welcome to another Thursday Craft'n Chat with Made Especially For You. I'm Abby from ScrappinAbby and I am really excited to share some scrappy tips/techiniques with you. Today I will be showing you how to create a really quick and easy card by using the resist embossing technique.

I will put a complete list of the supplies I used at the end of this post but first let me show you what I started out with...

I chose some paper & the stamped images I wanted to use on my card. Then I pulled out my Perfect Medium, clear emossing powder, my heat tool and the inks I wanted to use on this project.

Before I started stamping my images, I cut my paper for the card. It's much easier if you have your papers trimmed and ready to go before you start embossing.
In this photo you can see that I have my paper all ready to go. I chose to use a butterfly on this piece..you can see it on my clear stamping block. I applied some Perfect Medium to the image...make sure you apply a good amount as this will help the emobssing powder adhere to the image which results in a nice clear stamped image. Now you don't have to use Perfect Medium, you can use any form of embossing stamp pad. I just happen to like this particular brand best : )  You can also use an embossing pen if you have smaller stamps you want to use or if you want to add more detail to your stamped image.

Here's a better picture of how I "inked" up my stamp with the Perfect Medium. You can pat your stamp pad on top of your stamp or you can flip it around like it is in this picture...just depends on which method you are more comfortable with. Once you've juiced up your stamp...go ahead and press it onto your paper..be sure to press firmly but don't move it around or else your image won't come out crisp and clean...

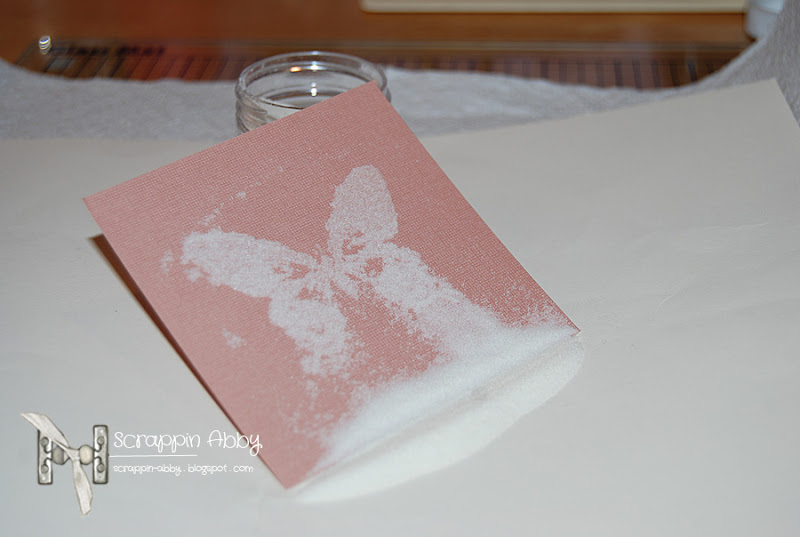
After you stamp your image you will want to go ahead and sprinkle your clear embossing powder over your image. A few pictures above you can see that I had my embossing powder out and open so it was ready for this next step. I also wanted to note that you will need to make sure you are using CLEAR embossing powder when doing this technique. I will show you why in just a moment. After you dust off the excess embossing powder you will use your heat tool over the image to emboss it. I wasn't able to take a picture of this process while I was doing it since I was alone...sorry about that.

This is what you will see after using your heat tool. Next you will ink your image.

I start off by inking up my blending tool and then going over the entire piece of CS and over the embossed image. Now you can ink this as dark or as light as you want..I chose to make my edges darker so the image "popped" a bit more.
This is what you will see after you ink your embossed image. Now you can see why you want to use clear embossing powder..this is what makes the "resist" embossing. The ink won't adhere to the stamped image, only on the paper around it...pretty cool huh : )

The next couple of photos are of the same process I went over above but are for the stamped sentiment on my card. I wanted to show you how this same process looks on lighter paper and with a different color of ink....

And here's the completed project....

Here's better view of the resist embossing...
See how cool that looks? I really enjoy using this technique on my projects. You can use this on not only cards but layouts, tags, gift bags and all sorts of other scrappy projects. The possibilites are endless with this technique.

If you haven't tried resist embossing before I want to encourage you to do so. It's super easy to do and you get such a beautiful & unique look on your projects when you are done.

Thank's for letting me share this technique & project with you..I had a lot of fun working on this card.

Happy Scrappin!

Abby
http://scrappin-abby.blogspot.com/

Products used:
DCWV-Coral Couture Stack
Ranger Perfect Medium
Tim Holtz Distress Ink-Frayed Burlap
Close To My Heart Clear Embossing Powder
Heat tool
The Twinery-Caribbean twine
The Girls Paperie Market Trims-Jubilee
My Minds Eye clear stamps

Wednesday, March 28, 2012

Perfect Sentiments Challenge 25: Sketch Challenge

Hey everyone...welcome back for another FAB challenge with The Perfect Sentiment

This weeks challenge is to create a card with a sentiment of congratulations or any sentiment that acknowledges an accomplishment or encourages someone to pursue their dreams/goals.  Examples include:  Congrats, You Did It, Dream Big, So Proud of You, You Rock, Shoot for the Stars, etc.  Remember your sentiment must be on the front of the card. 


The twist....Use the attached sketch as inspiration for your card design.  Feel free to rotate or flip the sketch to make it work for you as long as we can still see the basic outline of the sketch in your design. 

I will show you the sketch in just a moment...first here's my take on this weeks challenge....
Now here's the sketch that you will use for this challenge...
You can flip the sketch & make it your own...just be sure we can still see the basic theme in your creation. Now for more of my Celebrate You card : )


I stamped my Celebrate sentiment on some Frappaccino CS using distress ink in Iced Spice. I had this fab vintage trim I picked up junkin...inked it with some Antique Linen distress ink to give it that aged look and I topped it off with a staple after using more of the Iced Spruce around the edges. 
Now this part was really fun to do. I love to fussy cut~yes that might sound insane to some of you but I find this very relaxing & I may or may not cut with my tongue poked out...hey it helps me cut straight ; ) anyway I fussy cut the peonie that matches the one directly underneath...inked the edges with more Iced Spruce & used a dimensional adhesive dot to make the petals & the leaves "pop" off the card. I snipped some foam floral centers from a flower I had for the center. I really like how this turned out...it just adds so much more to card I think. 
Here's a closer look...
I've had these wooden letter tiles for some time now...I can't recall where I picked them up...I luckily had these letters in the jar. To be honest..these were my starting point for the design in this card. I wanted to use something different than just another stamped sentiment or stickers etc...these were perfect! Normally I distress the heck out of most everything I put on a card but this time I just let the embellishment speak for itself. I ran a strip of some fuzzy green trim on the bottom to finish it off. 
A little peek at the inside : )
I receive a lot of very kind comments from my followers/visitors regarding the insides of my cards. I truly appreciate your kind words. I LOVE making the inside look just as pretty as the outside...I mean..it just completes the look. I can't stand how boring and plain store bought cards look on the inside...I mean they are just white with a small sentiment inside...blech!! ; )


So are you ready to see some awesome inspiration from my fellow DT members? Just to let you know...I've already seen their cards and you will not be disappointed let me tell you...I am surrounded by some very creative & talented ladies : )


Jenn
Sami 
Jan
Karen
Maggie 
Sassy 
Tabitha
Theresa

 And don't forget to visit our guest DT for the month of March...
Cheryl

Our amazing sponsor for this weeks challenge is Pattie with Pattie's Creations 
Pattie is offering up one free digi for this weeks winner. She has been a faithful sponsor of The Perfect Sentiment so be sure to stop by her Etsy store and give her some support!!

Now that you have been inspired by the Perfect Sentiment DT...head into your creative space and get started on your card for this weeks challenge. We love seeing our faithful friends who enter our challenges each week and we would love to see some new creative friends join us as well. So tell all of your creative friends about our challenge for this week and start submitting those cards : )

Be sure to come back tomorrow for another scrappy post...I will be doing a written tutorial with some photos on how to do the resist embossing technique...you won't want to miss it : )

Happy Scrappin!!

Products used:
Coredinations CS-Frappaccino
My Minds Eye Life Stories CS-White Peonies & Green Plaid
Wood tiles-scrappy stash
Celebrate sentiment-scrappy stash
Green Trim-scrappy stash
Tim Holtz Ideaology staple
Tim Holtz Distress Ink-Iced Spruce & Antique Linen
Vintage trim-scrappy stash