Showing posts with label Tattered Angels. Show all posts

Monday, October 15, 2012

May Arts/Helmar September Craft Challenge-Vintage Holiday

Hey everyone..today I have a super fun project to share with you...and hold onto your craft knives...there's NO paper in this project...GASP!!

I was lucky enough to be chosen by Bethney with May Arts to participate in another fantastic challenge. This time their "Partner in Craft" was Helmar. Our task was to use some of the amazing trims/ribbons from May Arts & use the Helmar 450 Quick Dry Adhesive for our project. I have a quick video for you too which shows the projects up a bit closer so you can see all of the detail.

First let me show you what I made then I'll show you what I had to work with : )

A Vintage Holiday!

And here's what we were given to work with (the trims reflect what I chose)

I knew right away what I wanted to create...so I picked up some of the craft cones for the base of my trees...grabbed my inks & glimmer mists and went to town...Christmas Town that is..haha.


The first thing I wanted to do was to get all of my trims sprayed & misted so they had time to dry. I used a combination of my mists to get some blended colors.


Ok I almost didn't put this pic in here but I just had to...I didn't take pics during the inking projcess for my pom pom trim as my fingers were as red as this parchment paper...my hubby would not have been happy with me touching the fancy pants camera with this stuff all over my hands. So I took a pic of the aftermath...sorta looks like a crime scene huh? I had red fingers for about two days..haha.
While the trims were drying I started in on my trees. I used the Helmar 450 Quick Dry Adhesive to adhere all of my holiday greenery and trims to the cones.
Just had to point out my May Arts "tree stand"...haha.

And here's the final result...the "big" tree.
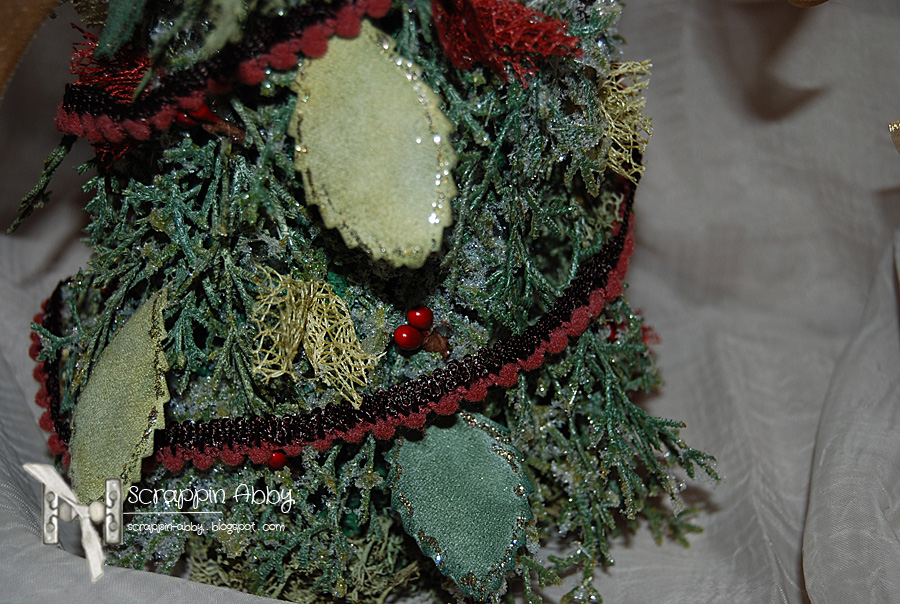
Here you can see the pom pom trim that I dyed...this was snow white when I first had it. I was going for this deep vintage burguny feel and I think that came through. You can also see bits of the mesh trim that I stained in a Santa Red & Mustard Seed from Tattered Angels Glimmer Mist. I tucked them throughout the trees so I could get more coverage from the materials that were sent to me.

I again mixed a few glimmer mists for the leaves to give them a different hue. I edged them with some Stickles to make them sort of pop from the rest of the greenery on the tree. Here you can see the Mustard Seed mesh a little better.

Here's the top of the smaller tree. Now this beautiful gold ribbon wasn't part of this challenge..but it is May Arts and it just went beautifully with the trees I thought.

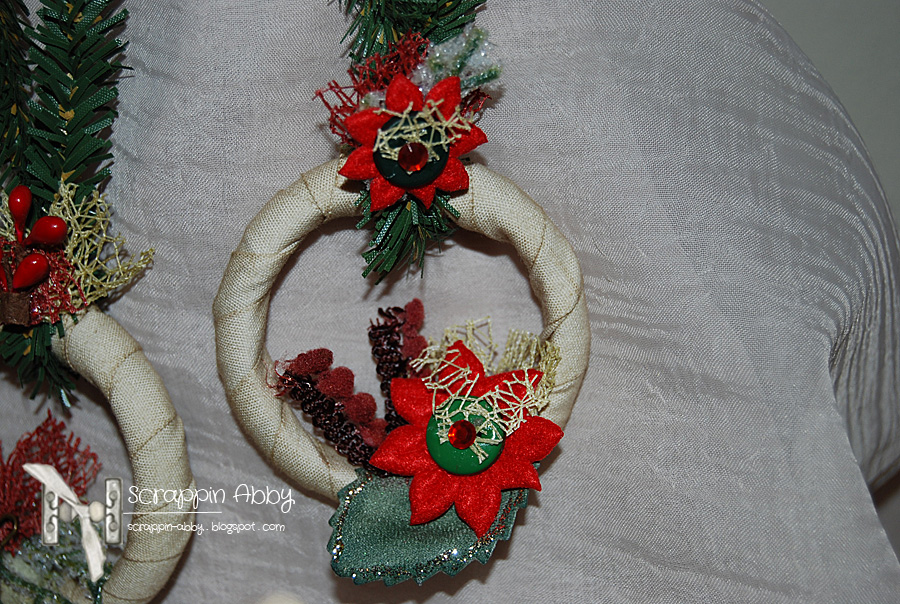
I wanted to make some little wreaths using my 4th choice of trim.
Here it is before I inked it up with some Frayed Burlap.

Here you can see the distress inking a little better. I used more on the edges so they were a litte more defined. I wanted to make these look like actual burlap cloth. I stole these rings from my kids bathroom shower curtain...haha...which I haven't replaced yet ; )


Yes I even did the back side : )


This was such a fun project to work on and it sort of put me out of my comfort zone a bit since I didn't use any paper or make a mini album this time...haha. Seriously though I do LOVE May Arts ribbon and I was truly honored that Bethney chose my idea and I was given the opportunity to participate in her challenges once again.

Be sure to check out the May Arts blog for all of the other amazing projects.

Thanks for stopping by and for checking out another scrappy post.

Happy Scrappin!!

Products used:
May Arts trims/ribbons
Helmar 450 Quick Dry Adhesive
Tattered Angels Glimmer Mists-Mustard Seed, Candy Apple Red, Santa Baby, Forest Green
Reindeer Moss-scrappy stash
Frosted greenery-scrappy stash
Stickles
Shower rings
Jingle bell-scrappy stash
Holiday berries-scrappy stash
Tim Holtz Memento pin
Tim Holtz Distress Inks-Frayed Burlap, Forest Moss
Tim Holtz Distress Stain-Fired Brick


Sunday, January 29, 2012

DCWV January Stack-a-holic Template Challenge!!!

Hi Friends...welcome back to another scrappy post...this is gonna be a good one as it's all about a LO I did for the January Stack-a-holic template challenge over at Erin's DCWV Diary blog..you can read all about it here.

I LOVE LOVE LOVE the DCWV paper stacks & had so much fun creating this LO. I am still scrappin up my wedding photos from 2 1/2 years ago..we seriously had a TON of photos taken due to have 2 photographers so this has been a work in progress since 2009 & I love it. 

Even though my wedding colors were purple..the Be Mine stack was just perfect for a LO of my wedding photos. The colors from the pages I used go so well with the photos I picked out. So without further ado...here's my LO I've called "Happily Ever After".....
I am seriously thrilled with how this turned out. The sketch shows 3 photos & I just happened to have these printed off and ready to go on a page.  
This paper is just gorgeous..the detail in the letters..textures & rich colors is just FAB! The blue felt trim at the top is from the Vintage Street Market Crate Paper Trims Neighborhood Collection (I cut the trim in half).
I fussy cut the Happily Ever After & added some pop dots for some dimension. I also didn't want to cover up the adorable cherubs in the background.
For the swag portion of the sketch I decided to fussy cut some more sentiments from the stack. I added some white eyelets and tied the sentiments using some Blossom twine from The Twinery to the soft pink wired ombre ribbon...Perfect!!
This next part was really fun as I was able to "play" with some of my Tattered Angels Glimmer Mist. The fabric scalloped trim comes plain..like muslin. I spritzed it with some Rose Glimmer Mist...let it dry and then spritzed it with some Glimmer Mist in Meadow Green. I was really thrilled that it turned out matching the DCWV paper so well...almost like I bought them together. I stapled the scallops to create a gathered feel. The flowers are cut from some ribbon I bought at a local craft store..I added some purple 1/2 pearls to make them pop off the page a bit. Here's a closer pic of the scalloped trim...
And one last look at my Happily Every After LO using the DCWV Be Mine stack & Metallic Stack....


Even though my wedding colors were purple...I found from this challenge that I don't always need to reach for mostly purple papers. I will most definitely be using more of the Be Mine stack in my wedding album. I think I will be putting this LO in a frame...I just love it (and I don't mean this in a tooting my own horn kinda way-I say this in the sense that the papers from DCWV are just so gorgeous and makes all of my projects turn out great!!! 


Thanks for stopping by my blog today and letting me share another scrappy creation with you that not only showcases the DCWV paper stacks but also gives you a glimpse into of of the most AMAZING days of my life (second only to the birth of my children). 

*Update-Erin at DCWV has just posted her video from CHA on her blog..you can check it out here. Trust me you don't want to miss this...they have a scrapbook tree~insert high pitched schoolgirl giggle here~


Be sure to come back tomorrow for another scrappy post & weekly challenge from Made Especially For You challenge blog. 


Happy Scrappin!!


Recipe for this LO:
DCWV Be Mine stack & The Metallic Stack-Nightlife
Coredinations Canvas Texture-Sandtrap
The Twinery-Blossom
Vintage Street Market-Crate Paper Trims-Neighborhood Collection
Tim Holtz Distress Ink-Spun Sugar
Pen used for journaling-Stampin Up-Chocolate Chip
Fab Scraps-1/2 pearls in purple
Tim Holtz Staples
White eyelets-from my scrappy stash
Mistable Trim-from my scrappy stash
Tattered Angels Glimmer Mist-Rose & Meadow Green


Wednesday, December 14, 2011

Perfect Sentiments Challenge 10: Anniversary Inspiration

Happy Wednesday fellow scrappers...you know what today is right??? Another weekly challenge from The Perfect Sentiment Challenge Blog!

This weeks challenge is to create a card with an anniversary/marriage theme & sentiment and the twist is to create your card from this inspiration pic...

Now I have to point out that I LOVE this photo and EVERYTHING in it...so I was really excited to create this weeks card. Here's my take on this weeks challenge.......

I didn't really stray too far from the inspiration pic since I loved it so much. 
I love love love hydrangeas...I had them at my wedding...so I was inspired from the bucket full of them from the inspiration pic & decided to make some of my own. I took some white hydrangea flowers...sprayed them with some Glimmer Mist from Tattered Angels (sorry I am posting upstairs today & my supply list is in my craft room so I can't tell you the exact colors). After they were dry I cut the flowers into individual petals so I could arrange them how I wanted around my sentiment. I did put some white ink from Stampin Up on them so they were a little shabby looking and subdued.
I cut out this chandelier from my Kaiser Craft Bonjour paper collection..."hung" it with some silver beading and wrapped it around some white tulle. To mimic the paneling on the side of the house I ran some white Bazzil through my Fiskars crimper. The patterned paper is also from the Bonjour line...love it!!
This sentiment is from Quick Quotes...I won this pack at a crop & I don't recall the name of the pack this came from...sorry.


I added little tuft of tulle in the corner (these are actually cut from the Tim Holtz Tattered Flowers Die...I just stacked about 10 layers together).


And here's the inside...I carried the silver beading from the front to the inside. 


Now for some more inspiration from my fellow DT members.......

Sami 
Sarah 
Jan 
Kimberly 
Rochelle 
Shaunna 
Tere 
Joan aka Sassy 

I also want to be sure and mention our two December Guest Designers...
Sam

Our sponsor for this weeks challenge is Shelly's Images 
Shelly is generously offering up a $9 voucher which is the equivalent to 3 Digi images...cool huh? Be sure to stop by Shelly's store and tell her the Perfect Sentiment sent ya : )


Now that you have seen the gorgeous inspiration photo...some DT submissions & know about the fab prize for this weeks challenge...head to your creative space and get started on your submission. Be sure to head to The Perfect Sentiment for all of the challenge information & guidelines. 


Be sure to come back tomorrow for another scrappy post...I will be showing you some holiday chipboard display boards I made. 


Happy Scrappin : )