Showing posts with label tutorials. Show all posts

Monday, August 19, 2013

Steam Punk Tag & Box Tutorial with Scor-pal and Viva Las Vegas Stamps

Hi Friends! The Scor-pal DT did a cross promo with Viva Las Vegas stamps (click HERE to see the post on the Scor-pal blog) and I'm really excited to share my Steampunk project with all of you that I created using Scor-pal products and the awesome VivaLasVegas stamps. I chose to create a Steampunk tag & tag box that you can use to hold your tags.


I also have a quick video showing you the project up close along with the stamps I used...


Products used:
 

After picking out the card stock I wanted to use for my tag box, I cut the paper into a 10 1/4"x 4 3/4" strip

Lay your card stock lengthwise on your Scor-pal at the 3/8" mark and then make a score mark at 1"
Next you'll move your card stock all the way to the left edge of your Scor-pal and make score marks at 4 1/4", 5 1/2" and 9"

Turn your card stock 90 degrees and make a score mark at 3" and then fold along all of your score lines
In the next photo you'll see where I've trimmed off a portion of my card stock...this creates the flap you need to make the box

After making the cuts above and folding on my score lines, I placed the card stock back on my Scor-pal (see the photo below for placement) and made one last score mark at 4 1/4". This creates the flap to turn up into the bottom of your tag box.

Apply Scor-Tape to your card stock as you see in the photo below 

I happened to be using some distress card stock so I sanded the edges of my paper before I peeled off the adhesive backing

Next you'll assemble your tag box after you've removed the Scor-Tape backing

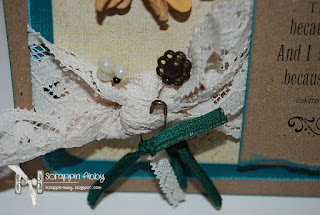
In the photos at the end of the tutorial, you'll see how I used a variety of papers and metal embellishments to decorate the tag box. 

For the tag I used one of the amazing images from Steampunk Plate 1336. I used a few different Distress Marker colors to give my stamped image some depth

I really love how crisp and clear the stamped image looked on this vintage piece of paper. 

Here I used some metallic gold ink on another image from Plate 1336

I somehow missed taking a photo of the shoe images I used for the background on my take but I wanted to use some two-tone embossing powder instead of ink for this portion of the project. You'll see the images in the photos below : )


This was my first time using the VivaLasVegas Stamps and I LOVE them!! Using them along with the Scor-pal products you can create some amazing projects. 

Thanks for stopping by and checking out another ScrappinAbby & Scor-pal DT project.

Happy Crafting!!

Thursday, July 11, 2013

May Arts Round 2 Project:Shabby Chic Ribbon Chandelier

Hi Friends! I was over the moon excited when I saw my name in the LIST of those who made it to Round Two of the May Arts 2013-14 Design Team Call. I pretty much knew exactly what I wanted to create with the May Arts ribbon for this project...a shabby chic ribbon chandelier. I love chandys and have been looking for the perfect vintage chandelier to put in my craft room so I decided to create one from ribbon in colors I love to hang in my creative space. 
 
Since I applied for the May Arts DT Video Tutorial position, I have a video tutorial for you that shows you how I created this chandelier along with some footage of the project before I started and of the completed project....

Here are some additional photos of the completed chandelier : )
The base of the chandelier is a vintage wire hanging basket. In the video tutorial I show you how I tied the ribbons to the basket and added some decorative baubles along with the trims. Everything you see on the chandelier is from May Arts with the exception of the baubles which are hung with fishing line (that I may or may not have taken from my hubby's tackle box..lol). 

Here are a couple of photos of the chandelier hanging in my craft room in it's new home...


I really love how this chandelier turned out and the May Arts ribbons are just gorgeous and really make this chandy so beautiful & shabby chic looking...which is just what I love : )

Be sure to check out the May Arts blog as Bethney will be posting the projects from all of crafters who made it to the 2nd round. I can't wait to see the projects from the group of creative ladies on the list. 

She's making the 2013-14 Design Team announcement on July 29th so be sure to check back for that exciting post. Please keep your fingers & toes crossed for me as I would LOVE to be a Prima Ribbonista and get the opportunity to play with the gorgeous ribbons and trims May Arts has to offer. 

Thanks for checking out another scrappy post and happy craftin!!


Sunday, June 10, 2012

May Arts Ribbon DT Call : )

Hey everyone...sorry it's been a few days since my last post. I've been busy in my craft room playin with paper for the May Arts Ribbon DT Call and we've been wrapping up the last days of school for my kids. I now have a Junior & 7th grader..yikes!!

Ok back to business ; )  today not only am I applying for the May Arts Ribbon DT..but it's also my video debut. This is something I've wanted to do for some time now but was sorta nervous to try but now that I've done it..I'm hooked!! I'm so used to doing written tutorials so it was a bit different at first..I kept giggling..but I finally held it together and successfully made my first video tutorial which I am happy to share with you today.

I'll be sharing 5 projects with you...some I've shown before but I have some news ones as well. First up is my "Thinking Of You" tag that I created using the resist emboss technique. I will show you some quick photos of this tag & then it's time for my video tutorial : )


And now for my video tutorial...drum roll please : )


I am really excited about this next project. I've been hoarding my Graphic 45 Little Darlings collection for the perfect project & this was it. I made a mini using this paper pack & some of the yummy ribbon from May Arts. I'll be showing you some of the pages in this mini along with another short video that provides more detail of the pages & some up close shots. 

And here's the quick video showing the whole mini : )


The last few projects I will sharing with you are two cards & a layout..the LO is extra special to me since it has a pic of my hubby & I which was taken on the day of our engagement photo shoot. 

 I hope you enjoyed looking at my scrappy projects & my videos...I had a TON of fun creating these & making the videos was a blast. I am seriously kicking myself for not doing this a long time ago...so watch out...there will be more to come : )


Thanks for stopping by my blog & seeing what I've been up to. If you think about it..keep your fingers & toes crossed for me that I'm what May Arts is looking for and that I make it to the second round for their DT call : )


Be sure to come back for another scrappy post. 


Happy scrappin : )